5 Things to Know Before You Hike Gunung Lawu via Cemoro Kandang

5 Things to Know Before You Hike Gunung Lawu via Cemoro Kandang at Night Without a Guide

Gunung Lawu is a dormant volcano that borders central and east Java. The peak sits at 10,712 feet (3,265 meters). It is a very popular mountain to climb among college students.

5 Things to Know Before You Hike Gunung Lawu via Cemoro Kandang

1. Price: The price is the same for locals and foreign tourists (RP 15,000). Parking a car cost RP 20,000.

2. Location: Basecamp for Cemoro Kandang. Here you can park your car or motorcycle, register (don’t forget your ID, you need it to register) and use the bathroom (the only one available on the whole trail).

3. Duration: Cemoro Kandang is around 7.5 mi/12 km from basecamp to peak. Mostly hard dirt/clay and some rocks. The trail zig-zags with some short cuts that are very steep.

4. What to bring:

  1. Water. We carried two 1500 ml bottles each.
  2. A small camp stove and pot to heat water and instant food.
  3. A cup and spoon to mix your drinks.
  4. Food. We packed some instant noodles, Snickers, Soy Joys, and homemade scones.
  5. Something to sit on. I cut open a small trash bag and used it to sit on. It was light to pack and waterproof. The Posts along the trail are really dirty. Having something clean and dry to sit on while I rested was a relief.
  6. An extra bag to carry your trash. PLEASE pack it out!
  7. Warm clothing. Don’t underestimate how cold it will get. The temperature can get as cold as 0 degrees Celsius/32 degrees Fahrenheit. When you are hiking you will be very warm, you will even get sweaty, but as soon as you stop moving you will get cold. 
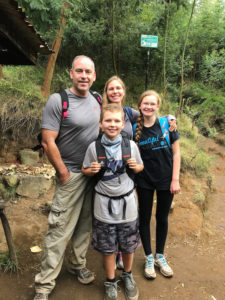
You can see from our video that we didn’t wear heavy clothing at the beginning of the hike. Seth hiked in his shorts most of the way up, but when we stopped to rest and reached the summit we put extra clothing on. I recommend bringing an extra pair of socks to change into before heading back down the trail.
  8. Flashlight with extra batteries. This is essential if climbing at night.
  9. Good comfortable shoes with good tread. Your feet will thank you!
  10. GPS. While most of the trail is easy to follow it is important that you bring some sort of GPS device with you. You can download our GPS track and waypoints here. You don’t want to risk getting lost without a guide.
  11. You might consider bringing sunscreen too!

5. Important Facts: 

  1. The only bathrooms are at the base camp. Be prepared to find a bush!
  2. There is no water or food stalls along the trail. Bring plenty of both. You might get lucky and someone will be selling something, but don’t count on it!
  3. Weather. The trail gets very slippery when wet. I wouldn’t recommend hiking in the rain unless you are an experienced hiker.

Watch our video here to get a better picture of what to expect when you hike Gunung Lawu via Cemoro Kandang. We had a great experience and felt prepared. We hope these 5 Things to Know Before You Hike Gunung Lawu via Cemoro Kandang will help you get prepared for a great adventure!  Keepsm:)ing!

4 Things to do in Yogyakarta

Yogyakarta is a bustling city located in the middle of the island of Java. We have lived here for several years and want to recommend 4 things to do in Yogyakarta.

4 THINGS TO DO IN YOGYAKARTA

#1. Go to Kaliurang: Enjoy the Monkeys and Take a Merapi Jeep Tour

About 40 minutes north of Yogyakarta is an area referred to as “Kaliurang”. It’s much cooler up there than it is in the city. You can enjoy some of the local food, watch the monkeys, buy some souvenirs, and book a jeep tour from there. The Jeep tour will take you to a bunker and also a museum. It’s a pretty fun trip. Don’t have your expectations too high, but sit back and enjoy the beautiful scenery. If the day is clear you will have a good view of Mt. Merapi from the bunker.

Watch our video here to see a bit of what you can expect from a Jeep Merapi Tour.

You might also consider booking a SUNRISE Jeep Tour. Watch our video here to see more!

#2. Hike Gunung Api Purba: An Ancient Volcano

This is one of our favorite places to take guests when they visit Yogyakarta. It’s about 60 minutes from the city and about a 45-60 minute hike to the top. There are quite a few places to rest and take pictures on your way up and the views are beautiful on a clear day. I highly recommend that you go up in the morning before it gets too hot. One of the great things about this hike is that the entrance fee for a foreigner is the same as for a local. That’s rare in Indonesia!

Check out our video here for a brief overview of the hike!

#3. Go to Pantai Parangtritis “Parangtritis Beach”

Pantai Parangtritis is one of the most popular beaches for tourists to visit when they come to Yogyakarta. It will take you about 1 hour to 1 1/2 hours by car from the city. If possible don’t go on the weekends as that is when it is the most crowded. You can rent ATVs, ride a horse, rent a beach umbrella and eat some simple Indonesian food. While we almost always swim at the beach you will see warning signs all over. The undercurrent is pretty strong, so be safe and stay close to the shoreline.

Click this link to see the drive to Parangtritis, the food available when you get there and see Parangtritis Beach up close!

#4. Shop on Jalan Malioboro “Malioboro Street”

This is by far the most popular tourist shopping area in Yogyakarta. If you want souvenirs, this is the place to buy them. At night it really livens up. You will find vendors selling food and trinkets along the street. Towards the south side of Malioboro is a store called Hamzah Batik, which has two stories full of souvenirs. The prices are fixed and reasonable.

Watch our video here which shows you a lot of the streets here in Yogyakarta, Malioboro Street, Hamzah Batik and also includes some footage from #1 on our list, Kaliurang. This video was shot on Indonesia’s Independence Day so there are some extra festivities going on that aren’t usual. If you want to fast forward to see Hamzah Batik souvenir shop, it begins at minute 05:00 of the video. The trip up to Kaliurang begins at minute 06:30.

BONUS: Here is a playlist of 5 Restaurants in Yogyakarta that we recommend you eat at while you are in town!

We hope you enjoy your visit to Yogyakarta! Check out these 6 other YouTube videos about things to do while you are in Yogyakarta! You don’t want to miss Jogja Bay Waterpark, eating at a Padang Restaurant, eating spicy food at Warung Special Sambal “SS” and MORE! Keep Smiling! :)

Grojogan Sewu Waterfall – Tips Before You Go

Grojogan Sewu Waterfall – Tips Before You Go This is a beautiful little waterfall situated on the slope of Mount Lawu. It’s posted that there are 1,250 stairs. I did not count them, but that seems reasonable. There are handrails going up and down so anyone in fairly good shape shouldn’t have a problem. It is not handicap accessible though.

5 Tips Before You Go – Grojogan Sewu Waterfall

#1. Arrive Early

Beat the heat and the crowds. We arrived around 9AM and it was perfect. By the time we were heading back up the stairs it was starting to get hot and lots more people were showing up.

#2. Don’t Carry A Lot Of Stuff

For one, you don’t need to carry much because it is such a short hike and two, there are a lot of monkeys! You don’t want to have the misfortune of having your stuff taken from you.

#3. Bring Money

I guess this doesn’t need to be stated, but you should know the cost of entering the park for a tourist is much higher than the cost for a local. RP 160,000 for foreigner and RP 17,500 for local.

#4. Bring a Change of Clothes

If you plan to get wet you will want to bring extra clothes. There is also a swimming pool and a kid sized swimming pool if you choose to use it. Both pools require an additional fee. 

#5. Shop and Eat

There are many small souvenir shops right before you enter the ticket area. You can buy your souvenirs there or at the larger shop closer to the main road. There are many small eating stalls as well for you to choose from. They sell food like nasi goreng (fried rice) and nasi pecel (white rice with vegetables and peanut sauce).

Watch our video to get a better picture of what to expect when you visit Grojogan Sewu Waterfall.

5 Things to Do in Karimunjawa

Wondering what to do on this small island located in the Java Sea? In this blog post we are going to share 5 Things to do in KarimunjawaIt is still pretty underdeveloped and the vibes are pretty calm throughout the whole island. Just recently they have began developing their tourist attractions, so get there before it starts booming and buzzing with tourists. There are a couple of resorts and many hostel type places to stay. A handful of Western type restaurants await you as well.

Here are 5 things we recommend you don’t miss if you travel to Karimunjawa Island!

#1. Island Hopping and Snorkeling on a Traditional Boat

This was by far one of our funnest days on the island! We rented a half day tour through the Jiwaquest Breve Azurine Resort. They arranged everything for us. You can also arrange for a whole day tour. We were picked up at the resort and escorted to our boat. The view of the Java Sea was beautiful. Our first stop was to snorkel. I don’t know how long we spent there, but there were tons of fish to admire in the beautiful clear waters! Amazing!!! All the gear was provided. We boarded the boat again and were given water and watermelon to snack on. We then traveled to a small island called Pulau Cemara Kecil “Small pine tree island”. We were given time to explore the island, comb the beach for shells and starfish and take lots of pictures. We boarded the boat again and sailed to another small island where we watched the sunset and of course took lots of pictures.

You can watch our half-day tour here to get a glimpse into what you can expect when you book a tour.

#2. Kayaking

We stayed at the Jiwaquest Breve Azurine Resort, which provided kayaks for its guests to use free of charge. We launched our kayaks right off their own private beach. The water was clear and you can go pretty far before you come to the end of the reef. You can wear life vests that they provide or go without. They have single or double kayaks to choose from. Coasting on the water and soaking up the sun was so relaxing!

Check out our video about the Resort and you will see the kayaks and other swimming gear that they provide.

#3. Rent a Motorcycle (Scooter) for the day

Definitely do this! You will get a better feel for the island as your travel along its small uncrowded roads. The resort arranged for us to rent two motorcycles for the day. Don’t be alarmed, they don’t provide helmets. We were told that there are no police on the island and no one wears them. I don’t know if that is true, but from our observation very few people had helmets on.

Check out our motorcycle ride here which also features the next thing to do on the island!

#4. Visit Bukit Love “Love Hill”

If you love to take pictures, then this is a great place to visit! As they say, it’s very “Instagramable”. At the top there are great views of the sea and the city. It is cheap to enter and you can buy some souvenirs as well.

#5. Go to the Alun-Alun At Night and Buy Souvenirs

If you didn’t find the souvenir you wanted at Bukit Love, then head to the alun-alun in the evening, after 6:00 PM. This is like the city square where the community hangs out in the evenings. The city will come to life now that the temperature is cooler and there will be lots of people selling food and souvenirs. If you buy in bulk you will be offered a cheaper price.

We stayed around and bought some souvenirs at the end of a Barikan Festival. You can see some of those souvenirs plus what the alun-alun looks like by watching to the end of this video.

We hope you enjoy your vacation to Karimunjawa Island as much as we did! Keep Smiling! :)

BONUS INFO:

1.  Watch here to see what it’s like to take the fast boat (Bahari Expres) to Karimunjawa Island.

2. Finding Western food can be tricky on Karimunjawa Island. If you’re looking for Burgers and Pizza, we recommend eating at Eat & Meet.

3. Great smoothies, cheap accommodation and cheap tours on Karimunjawa available at the Happinezz Restaurant. 

Bakso Pak Sidan III | Indonesian Food

Kuliner Jogja Bakso Pak Sidan III

Kuliner Jogja Bakso Pak Sidan IIIHey guys,

Bakso is a popular food to eat in Indonesia. It is much like a meatball, but with maybe more surprises! The other day we went wondering around to try a new place to eat that was near our house. We came across Bakso Pak Sidan III, a small local restaurant. Three things you should know before you eat here. 

  1. Lots of bones. Be prepared to be served many parts of a chicken that the typical American doesn’t eat. Skin, bones, organs may all be swimming in your soup. If you don’t want to eat them or can’t identify them, don’t be embarrassed to eat around them.
  2. Noisy location. Bakso Pak Sidan III is right on the main road, so all of the traffic noise is in your face. You will get a good feel for Indonesian weather as well because there is no air-conditioning.
  3. Inexpensive prices. This is where locals eat so the whole meal is very reasonably priced. Eat a couple of bowls of bakso and have a drink or two and you still will have money left in your wallet.

Please watch this video to see for yourself the location and how the food is prepared.

Keep smiling!

Julie

Address for the restaurant: Jl. Raya Tajem 412, district. Depok, Sleman, Yogyakarta 55281

Google Map

Stay up to date by subscribing to our YouTube channel.

Youtube Subscribe Button

Eating at R&B Grill, Western Food in Jogja

R&B Grill Jogja


R&B Grill JogjaHey guys!

Sometimes I really crave eating food from back home. I love rice and noodles, but having a break in our diet is such a special treat!  A friend told me about this restaurant here in Jogja called R&B Grill. I have to say, I love it! Why do I love it?

  1. Salads – We have eaten here three times now and I have enjoyed each experience. The first and second time we ate here I ordered a salad! Salad!!! I love salad. Indonesians don’t typically eat a lot of raw vegetables and I don’t make them at home very often. Trying to get the lettuce sufficiently clean while keeping the leaves crisp is a challenge. R&B Grill makes delicious salads. As you can see in the video from Seth’s salad, they are gorgeous and full of tasty vegetables. This time I ordered tomato soup and it was also very good. I think next time I might try a burger like Marty did. OR, maybe another salad!
  2. Imported Foods – R&B Grill has a small grocery store that sells imported foods. They are the only place in Jogja where I have found to buy flour tortillas, refried beans and delicious tortilla chips in one location! Mexican night!!! Yes, please! The Johnson family loves Mexican food!
  3. Ambience – As you enter you step right into the grocery store. Continue towards the back for the restaurant and you can be seated inside with air conditioning or outside on the patio. The room is not large but well lit with music playing. Not too loud that you can’t enjoy your conversation with your friends though.

So, as an occasional treat for us, we will be headed back to R&B Grill. Please watch this short video to see inside the store and restaurant!

R&B Grill Address: Jl. R.W. Monginsidi No.37, Kota Yogyakarta, Daerah Istimewa Yogyakarta, Indonesia
Google map link: http://ift.tt/1MnHFIy

Keep smiling!

Julie

Stay up to date by subscribing to our YouTube channel.

Youtube Subscribe Button

Best Microphone for the GoPro Hero 4 Silver

GoPro microphone test

I’m trying to find the best microphone for the GoPro Hero 4 Silver. As a travel vlogger living in Indonesia I get to vlog in many locations that are not ideal for recording sound. In my opinion, the ambient noise is interesting and should be part of any good travel video but I don’t want it to be overly distracting.

In this video I test five microphones with my GoPro Hero 4 Silver trying to find the best microphone for vlogging in challenging locations.

In order to record sound through an external microphone on the GoPro Hero 4 Silver the first thing that you will need is the GoPro 3.5mm Mic Adapter. This adaptor will allow you to plug your microphone in to the GoPro.

Here are the microphones I tested.

GoPro Hero 4 Silver Built in Microphone The built in microphone on the Hero 4 Silver sounds great in quiet locations. It doesn’t do too bad in semi-noisy locations either. However, when you get to a very noisy location like the side of a busy street it is not so good.

Audio Technica ATR-3350 The Audio Technica ATR-3350 does a great job of cutting out most of the traffic noise when compared to the on board microphone of the Hero 4 Silver. The sound seemed a little tinny but that may improve by changing the microphone’s location. One problem with this microphone is that it requires a battery and you have to remember to turn it on. That is hard for me!!

Sony ECMCS3 Microphone The sound produced by the Sony ECMCS3 microphone sounded a bit muffled and not as tinny as the Audio Technica ATR-3350. One thing that I noticed was that the background noise got progressively louder during pauses in speech. Once I started speaking again the background noise would drop back off. A big plus for this microphone is that it does NOT require a battery or to be turned on.

Rode SmartLav+ The Rode SmarLav+ also did a good job of cutting out the background noise. The sound was comparable to the other microphones already tested. One plus about using the Rode SmarLav+ is that it also works with your iPhone. So if you record a lot of video on you iPhone this might be a great option. However, when using it with the iPhone as an external audio recorder you will have to sync the sound in your video editor.

iPhone 6 DIY Earbuds Microphone As with the Rode SmarLav+ using a DIY earbuds mircophone might be a great option for you if you record a lot of video on your iPhone. However, you will also have to sync the sound in your video editor.

The Verdict

I like the built in microphone in most situations but when I’m in a really noisy situation I think I’m going to use the Rode SmartLav+ or my DIY microphone because I already use them a lot on my Indonesian daily vlog recorded almost exclusively on my iPhone.

Which microphone did you like the best and what other solutions have you found for getting great audio in difficult situations?